We started by soaking the pennies for 5 minutes in a mixture of vinegar and salt. Make sure you don't do this with post-1982 pennies, or they'll turn black. After scrubbing with a toothbrush, rinsing, and drying them, they looked much cleaner, but I decided to test out the pencil eraser tip (method 5 from the link) as well, and I was amazed by the difference.
Check out the 1946 penny!
Rubbing them with the pencil eraser after the vinegar soak/scrub/dry took almost no effort, and the end result was so worth it! I decided to try the eraser on a penny I hadn't first cleaned with vinegar. It took a lot more rubbing, and the crevices didn't come as clean as the pre-cleaned pennies, but it still looked much better than it started.
 |
| Left: vinegar wash, then eraser. Right: no vinegar wash, just eraser. |
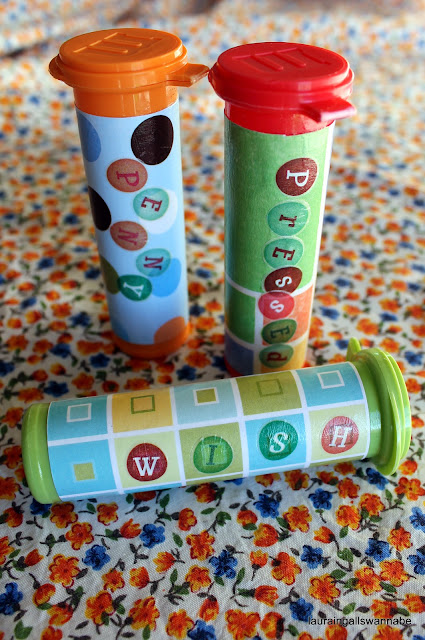
Once I finished cleaning the pennies, I stored them away in our penny tubes for the park. I made these from M&Ms Minis tubes wrapped with scrapbook paper, labeled with stickers (Meg did this part herself), and coated in Mod Podge for durability. I wish I could tell you where to find the Minis tubes in stores, but my kids received them as gifts last year from family, so I have no clue. Also, I can't take credit for this idea. It's all over blogs and Pinterest and Disney message boards.


1 comment:
If you are looking to keep track of the pressed pennies, try this free app.https://itunes.apple.com/us/app/penny-collect/id853824928?mt=8
Post a Comment