Monday, April 16, 2012

Tactile Matching Balloons - Sensory Activity

Margaret has a new toy, stored in this cute little felt basket I picked up for 70% off after Easter at Target. I love open storage for her toys, and she loves containers with handles. It was meant to be.


Inspired by this blog post I found on Pinterest, I made some tactile matching balloons for Margaret.


I took some balloons we had on hand (the strange colors are a result of our Office themed party a few years ago) and used a funnel to fill two balloons with each sensory material: sugar, salt, pinto beans, rice, oatmeal, lentils, and dry macaroni noodles.


I didn't tell her right away that there are two of each balloon. I made these while she was napping and turned her loose with them when she woke up. She gave each a quick squeeze, then lined them all up, tossed them back into a pile, and began exploring them a little further, trying to figure out what was in each one. Once she realized there were matches, she lined them all up again, this time in pairs.

Disclosure, I lined the balloons up for this picture. Meg wouldn't hold still long enough for me to get a shot of her playing with them.


I thought this might be one of those "play with it once or twice" sort of things, but she really seems into these balloons. She's played with them for the past 4 days and doesn't seem to be losing interest yet.

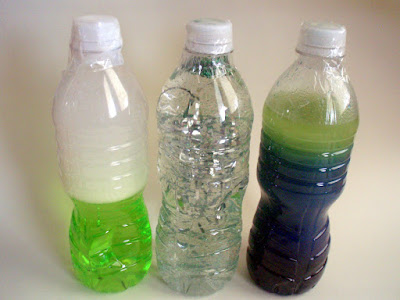
Also, you may remember the discovery bottles I recently shared. I made one more for her today, using clear dish soap and colored pony beads. This one is her favorite yet, as she's crazy for pony beads. She's fascinated by the fact that they don't fall quickly through the thick dish soap as they would with water.


Photobucket

Wednesday, April 11, 2012

Discovery Bottles (and Bags)


Inspired by this post by Cathy at Pre-School Play, we made some "discovery bottles" today. Margaret was able to help make these, and she and James both spent most of the morning playing with them.

We made 3 bottles focused on the effect movement has on different liquids.


1 - water, food coloring, and clear dish soap
2 - water, glitter, and foil strands (the kind used in gift bags and baskets)
3 - water, food coloring, and oil

We also made 3 "search and find" bottles.


1 - colored sand and small toys (plastic fish from a discarded magnetic fishing game)
2 - foil strands and small toys
3 - colored rice and small toys


I made 2 more of the liquid movement bottles, but they didn't turn out well. One was made with hair gel, food coloring, and marbles. The other was shampoo and marbles. I guess the gel and shampoo I used were too thick, because you couldn't even see the marbles, and they didn't move freely through the liquid. Rather than throwing them out, I transferred the contents to plastic zip-top bags (I reinforced the edges of the bags with clear packing tape). This turned out to be a happy accident, because the bags provide a fun sensory experience lost in the bottles. Love when that happens.


The gel and shampoo weren't the only issues I ran into making these bottles. I dyed the oil/water mixture too dark, making it difficult to see the effect, the coloring I used on the sand didn't take, the glitter clumped, and the plastic toys I originally picked up from the dollar store were too big to fit in the mouths of my bottles. Frustrating, but we got it all worked out in the end!


Ah, and I almost forgot to note, I sealed the tops of the bottles and bags with packing tape.


Photobucket

Tuesday, April 10, 2012

Stamping with Paper Towel Rolls

Pretty simple concept we tested out today. I cut an empty paper towel roll down into smaller segments, provided a tray of tempera paint, and let my artist go to town with it.


The width of the rolls was the perfect size to fit comfortably into Margaret's hands.


She decided she wanted to use a brush, too.


She even managed two-toned stamps.


James thought the whole experience was rocking.


Margaret figured out that the upturned roll segments made for nice brush stands. Pretty ingenious, yeah?


Partway through, she asked for more colors, so we had a chance to do some color mixing.


I love the texture many layers of stamping made on the paper.


And, of course, before we were done, the fingers had to have a dip.


Photobucket

Monday, April 9, 2012

Colorful Mini Eruptions

To begin, if anyone knows the original source for this pin, do let me know, as it was the inspiration for an activity we did this afternoon.

We started with a pie pan filled with baking soda (actually, two of them, as I figured Meg would want to do this a few times - I was correct!), some small containers filled with vinegar tinted with food coloring (liquid watercolor would work, too), and a medicine dropper (these eyedroppers/pipettes will soon be on their way to our house, but the medicine dropper worked really well).


I only had to show Margaret a couple times the squeeze, dip, let go, and squeeze technique and she was off! She kept chanting the steps to herself as she did the activity.


She used a squeeze of each color in the first pan and made a lovely rainbow of miniature eruptions.


Colored baking soda with the excess vinegar dumped out.

In the second tray, she seemed to prefer using up each color before moving on to the next.

The blue and green looked quite pretty, like ocean water against the white baking soda "sand."


The addition of the red vinegar made things a bit murky.


And the yellow finished the whole thing off with some of that good old "preschool brown" we all know and love.

I didn't use much baking soda, maybe 1/2", and I could have used less. The activity lasted a good half hour, and there was more "eruption power" left in the baking soda, but Meg decided to dump the remaining tinted vinegar into the pan to see a BIG eruption.


Photobucket

Thursday, March 29, 2012

Springtime Decor

Spring has sprung in the Wannabe house!

A few simple changes have brightened things up. (Please do ignore the unfinished paint job on the walls.)


I switched out the darker candles on my wall shelves for some fresher ones.


This candle holder used to be an antiqued black, gold, and emerald green. I gave it a rough coat of turquoise spray paint.


Target's Dollar Spot yielded some great springy decor, like this little tree,


this sweet resin bird,


and fun gel clings.


I love the birds on the bottom left. Margaret likes the butterflies.


My springtime hutch isn't too different from my winter one this year. I just took out the darker candles and linens and added my bright Anthropologie mugs.


The Easter Bunny may not have been by yet, but a melancholy bunny keeps watch over the Easter eggs in his absence.


I like using a tray in the middle of our dining table, because it makes the centerpiece easy to remove for meals. This year, since we have curious toddler hands about, the bunny dish is free of candy, and we've stuck with a child-made foam Easter Bunny house and practical cloth napkins in springy colors.


Photobucket